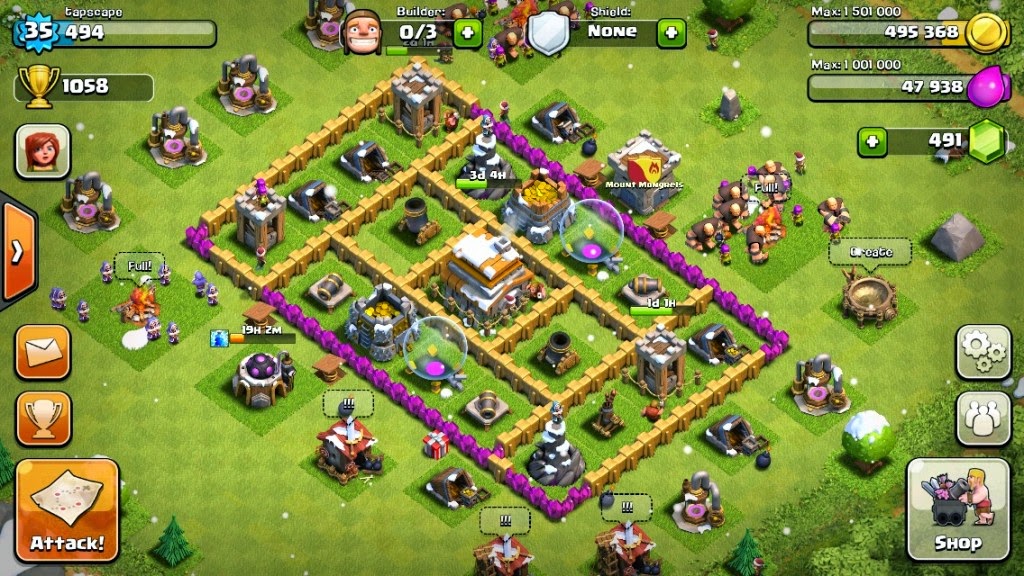
Showing posts sorted by relevance for query Clash Of Clans Attack Town Hall 5. Sort by date Show all posts

Tuesday, October 21, 2014

How to hide elixir in Clash of Clans | Hide up to 600,000 elixir


Hello fellow clashers. So after a long day of farming and spending som elixir for an upgrade, you are left with a big amount of elixir in your storage no shield and time for bed is coming. What would you do ? 
I'll show you a way on how to hide up to 600,000 elixir from attackers. If you don't believe than read this tutorial.


1. Fill the Army Camps first !!!


First step is to fill the Army Camps first (whatever you want) because when the camps are full, Barracks allow you to queue troops inside with out being released into Army Camps and by that you basically fill the Barracks with elixir. So make sure your Army Camps are fill up till the "Full" sign pop-up.


2. Choosing what troops to queue in Barracks.

Here we are going to choose troops with which we are going to fill up the Barracks. Now everything depends on you Barracks capacity and your troops training cost.


This best troops or army combination is "Wagon Army" which is a army made by Dragons and Wall Breakers. Mostly i prefer Wall Breakers because they take 2 space and it cost 3,500 elixir when fully maxed. So after you fill the Barracks with "Wagon Army" you can see that your elixir which was is storages now it's queued up it Barracks. Below you have a list with the best combinations to queue up Barracks depending on you Town Hall.

Town Hall 10: Three level 4 Dragons + Seven level 6 Wall Breakers + One level 6 Archer in each of the four level 10 Barracks = 603,200 Elixir

Town Hall 9: Three level 3 Dragons + Seven level 5 Wall Breakers + One level 6 Archer in each of the four level 10 Barracks = 517,200 Elixir

Town Hall 8: Three level 3 Dragons + Seven level 5 Wall Breakers + One level 5 Archer in each of the four level 10 Barracks = 516,800 Elixir

Town Hall 7: Three level 2 Dragons in each of the four level 9 Barracks = 360,000 Elixir

Town Hall 6: Twenty-seven level 3 Wall Breakers + One level 3 Archer in each of the three level 8 Barracks = 162,360 Elixir

Town Hall 5: Twenty-five level 2 Wall Breakers in each of the three level 7 Barracks = 112,500 Elixir

Town Hall 4: Twenty-two level 2 Wall Breakers + One level 2 Archer in each of the three level 6 Barracks = 99,240 Elixir

Town Hall 3:  Twenty level 1 Wall Breakers in each of the two level 5 Barracks = 40,000 Elixir


3. Don't forget to remove the queued troops !!!

After a good sleep in the morning, with you elixir hided in Barracks don't forget before making any attack to remove the queued troops form your Barracks, because you wouldn't want to have a army camp with 240 Wall Breakers. To remove queued troops from Barracks, click on the red - to un-queue troops inside.


That's it for today's tutorial, hope you have understand it and enjoyed it. Make sure to leave a comment below for this tutorial and if you have suggestion feel free to comment below.


Sunday, November 30, 2014

Clash of Clans Tips and Strategy Defense #1

Welcome to my Clash of Clans Strategy Guide. If you're just interested in the good stuff, skip down to below. Still with me? Good stuff. I'm starting this guide so I don't need to keep writing out the same suggestions for people when they want their bases reviewed. I'll still give specific details, but now I'll be able to link them to one place. Eventually this guide will probably be on the Reddit Wiki system, once it is released. Please do not post this guide without permission (just PM me and ask) and without crediting me. 

I'll try to keep updating this guide, and I'll try to keep it not so wordy, and have images, especially in the beginner chapters. Please excuse my [lack of] MSPaint skills. If you have advice, images, comments, suggestions of your own, please feel free to comment and I'll incorporate them.


Chapter 1 Sections:
1.1 Defend your Defenses
1.1.1 Oh God! Enemies Can Spawn There Too?!
1.1.2 Holes in bases are bad, mmk?
1.2 Overlapping Defenses
1.3 Splash Damage: It's your friend!
1.3.1: Where should I place my Mortar?
1.3.2: Where should I place my Air Defense?
1.4 Don't try to stuff everything inside your walls
1.4.1 What should I keep outside my walls?


Chapter 2: Advanced Base Defense

1.1: How to Defend your Defenses
Walls are good. But walls are not the only part in a super awesome base. The #1 mistake I see new players (or not so new players) doing is placing their defenses so they can be targeted by archers spawning outside of the walls. Don't make this mistake.

The difference between 'Decent' and 'Great' has to do with the way units decide which building to attack next. It it too complicated to get into here (this 'basics' section) but I think I'll cover it later in more detail.


The buildings protecting your defenses do matter - Mines/collectors will have more HP than Barracks/Builder's Huts.


1.1.1: Oh God! Enemies Can Spawn There Too?!Not good! Unless it's your enemy! from wadely
Yes, enemies can spawn around the ring of your base. No, you can't build there to stop them. 

1.1.2: Holes in bases are bad, mmk?
When you move any building or wall (but not decorations, it shows you white lines one space larger in every direction than that building. This is showing you where enemies can spawn. Make sure you don't have any holes in your base to let them spawn inside your walls. That would be bad. I will write about how to leave intentional spawn spots in your base later, in the advanced base defense chapter. 

1.2: Overlapping Defenses
Not Good.


Another common mistake is placing all of your defenses widely spread apart to cover as many buildings as possible. Dies very easily to several giants. Or to groups of infantry, especially archers. Or to balloons. Which I guess it means it just dies to everything. This often goes along with 'Trying to stuff everything inside your walls' covered later. 

1.3: Splash Damage: It's your friend!
Mortars (and later wizard towers) are your first and last line of defense against mass infantry attacks. A mortar's damage is only limited by how many troops your enemy puts down and how well you funnel them into where you want them. A fully upgraded mortar (level 6, total cost 3,752,000 gold) will do 45 damage in one shot to the unit it targets. In the same amount of time (5 seconds) an archer tower (level 1, total cost 1,000 gold) will do 55 damage to the unit it is targeting. What does this mean? It means you need to make sure your splash damage defenses are hitting enemies in groups and are protected. How do you get them to hit enemies in groups? Put then in the middle of your base - As soon as the enemy destroy a wall and funnel through it, they will be nice and bunched up for the mortars. 

1.3.1: Where should I place my Mortar?
Somewhere very protected. Probably in the middle if your base, ideally with it's own wall around it. 

1.3.2: Where should I place my Air Defense?
In the middle of your base. Mass are attacks are rare (due to time to build), but not unheard of. A single, upgraded anti air turret is a wonderful deterrent, but it should be placed in the middle of your base. More specifically, it should be placed such that, if a mass balloon attack comes, It won't be the first, second, or third defense they kill.

1.4: Don't try to stuff everything inside your walls
Not Good.


As a counter point to 1.2: Overlapping Defenses, don't try to enclose everything within your walls. First off you will often break 1.2: Overlapping Defenses and 1.1: Defend your Defenses by trying to cover everything, but secondly it is just a waste of walls. Double thick walls are better than a massive single thick wall. 

1.4.1: What should I keep outside my walls?
Absolutely keep your builder huts, Laboratory, Barracks, and Spell Factory outside your walls. None of these matter if they get destroyed - no progress or resources are lost.

Next I would keep out Army camps, and Gold Mines and Elixir Collectors. Each of these has a consequence if they get attacked: Mines/Collectors get resources stolen (but only uncollected resources), and if an army camp dies all troops stationed in it die. Some people really like keeping Mines/Collectors inside - It depends on how often you play. If you do keep a few inside, make sure they are your highest level ones.


What does that leave? Town Hall, Defenses, Elixir Storage, Gold Storage. All of these should be inside your walls and as protected as possible. If you are at a stage in the game where you don't care about trophies, you can also kick your town hall outside the walls. You will be easy to defeat, but if you're only trying to protect your resources then the town hall takes up a lot of space. 


Clash of Clans Tips and Strategy Defense #2

Welcome to Chapter 2. I sure was hoping to get this out a lot sooner than 3 weeks after Chapter 1, but stuff came up (mid terms) and I had some trouble with some tricky stuff (turret range details).

This chapter is much longer and much more detail oriented than the previous chapter. Where as I was trying to make Chapter 1: Base Defense, The Basics accessible to anyone, this chapter gets into the nitty gritty details which is probably more useful only at the higher levels of both gameplay and dedication. As such, it truly is a Wall Of Text™. I did still leave out some details that I thought were getting too specific, so if you want to know why I recommend something feel free to ask in the comments, PM me on reddit, or ask in clan chat in game of the clan I recently set up with the last patch. Now, without further ado, Chapter 2: Advanced base Defense!


Chapter 1: Base Defense, The Basics

Chapter 2: Advanced Base Defense
2.1 Are you a tempting target?
2.1.1 Large amounts of Loot!
2.1.2 Having easily accessible loot
2.2 Having a Good Base
2.2.1 The Standard Base
2.2.2 The Pocketed Base
2.2.3 The Large Pocketed Base
2.2.4 The Bulkhead Base
2.2.5 The Split Base
2.3 Funneling for Victory
2.4 Upgrading multiple defenses at the same time
2.5 Having a glaring flaw in your base
2.6 Buildings outside walls are too spread out
2.7 Turret Range Considerations: What can your towers defend?
2.8 Spawn Forcing
2.8.1 Trick Spawns
2.8.2 Why use trick spawns?
2.9 Messing with Wall Breakers
2.9.1 Decoy Walls
2.9.2 Outer walls with Buttresses
2.9.3 Using extra walls for Buffering
2.10 Upgrading walls
2.10.1 Oh, and DO NOT upgrade your walls in a polka dot manner.
2.11 Placing Traps
2.12 Clan Castle Placement
2.13 Tips and Tricks for Base Defense 


2.1 Are you a tempting target?The best way to not get attacked is to not make it worth your attacker’s time. There are several things that an attacker will likely attack to get, or not attack due to the presence of.

2.1.1 Large amounts of Loot!Loot is the #1 reason people will attack at low levels. If you don’t have much to steal, you’re safe! Spend as much as you can on walls prior to starting any upgrade. Spend on removing natural decorations when the builder is available. If you don’t have a worker available, start a research project in the Laboratory (elixir) or buy decorations (gold and elixir). 
Note that gold not collected (in Gold Mine or Elixir Collector) can be stolen. 

Other ways to spend resources - Queuing units (even when your army camps are full), building spells, starting research, buying defenses (bombs/spring traps), buying decorations (flowers and flags, they will prevent enemy spawning on top of them).

2.1.2 Having easily accessible lootAccessible loot comes in two types - accessible mines/collectors and accessible storage. Both are bad. Make sure your storage is either empty or in the middle of your base. Make sure your mines/collectors are next to your walls (and therefore next to your defenses). Uncollected resources are easier to steal then collected ones - the buildings are more spread out and the buildings have lower HP.

You should also intermix your elixir collections and mines as well as your elixir storage and gold storage. If an opponent really wants your gold, and all of your mines are together in a nice line, it is much more tempting of a target as not as much needs to be invested to steal the single resource they are seeking. 

Similarly, make sure your two gold storage are not next to one another. 

2.2 Having a Good BaseSee Chapter 1 for details (Common issues: not protecting your defenses, mortar and air defense placement, everything-inside-walls issue, spread out defenses). Also having defenses that are significantly below the ‘normal’ upgraded amount for your trophy count/level. Here are a few more common bases and what I think of each.

2.2.1 The Standard BaseThe standard base follows all of the rules laid out in Chapter 1 - Defenses and storage inside of the walls, army camps, barracks, mines, extractors, etc etc etc outside of the walls. There is a single wall dividing your precious base from the hordes of horrors outside. Now What? How can you improve your base? Well this standard base is weak to giants as once they breach your wall, they can attack all of your defenses without delay. It is also weak to mass goblin attacks for the same reason - Once inside they can often outrun splash damage and steal all of your goodies, possibly leaving you with a victory, but with many less resources to spend.

2.2.2 The Pocketed BaseThis base has the town hall in the center, and every defense around it is surrounded by its’ own 4x4 wall. They are good against giants as the walls slow them down, while keeping the defenses are close together. They are best attacked with giants and archer support.

2.2.3 The Large Pocketed BaseThis base is a variant on the pocketed base, where each pocket has 2-3 structures in each pocket. It is more efficient in terms of wall usage than the pocketed base, allowing for more buildings to be placed within the walls. People who love symmetry in their bases will like the 3 pocket base, as it creates a nice spiral with no wasted space or walls. The differences between this as the Pocketed base are minimal. This base type is more common than the Pocked Base at lower levels due to lack of walls.

2.2.4 The Bulkhead BaseA Bulkhead Base follows the rules laid down in chapter 1 about kicking unneeded buildings outside of the walls, then uses extra walls to segment defenses into different sections allowing for greater protection in case one section is breached (especially by giants). Bulkheads are used in large boats to prevent the entire boat from sinking in case of a leak below the waterline - The flooded sections are closed off via built in bulkheads, containing the flooding to only the affected sections. In the same way, bases use this strategy to contain (or slow) the flood of enemy troops to the breached bulkhead - Where as a single wall a breach would mean your clan is headed to destruction.

2.2.5 The Split BaseA somewhat common (but poor) base defense strategy is grouping your defenses into two groups, with critical non-defensive buildings between them (Town Hall, Resource Storage). This defensive strategy seems to not violate the rules I’ve put down in Chapter 1, but it actually violates the rule of keeping your defenses too spread out. Your defenses should be able to cover each other, ideally as much as possible - keeping them in two groups should be avoided. A split base defense is very vulnerable to giant attacks as they can clean up half of the defenses without taking fire from the other half. Split bases also mean that if either side is wiped out, your critical buildings in the center are very vulnerable to a few arche

Welcome to Chapter 2. I sure was hoping to get this out a lot sooner than 3 weeks after Chapter 1, but stuff came up (mid terms) and I had some trouble with some tricky stuff (turret range details).
This chapter is much longer and much more detail oriented than the previous chapter. Where as I was trying to make Chapter 1: Base Defense, The Basics accessible to anyone, this chapter gets into the nitty gritty details which is probably more useful only at the higher levels of both gameplay and dedication. As such, it truly is a Wall Of Text™. I did still leave out some details that I thought were getting too specific, so if you want to know why I recommend something feel free to ask in the comments, PM me on reddit, or ask in clan chat in game of the clan I recently set up with the last patch. Now, without further ado, Chapter 2: Advanced base Defense! 


Chapter 1: Base Defense, The Basics

Chapter 2: Advanced Base Defense
2.1 Are you a tempting target?
2.1.1 Large amounts of Loot!
2.1.2 Having easily accessible loot
2.2 Having a Good Base
2.2.1 The Standard Base
2.2.2 The Pocketed Base
2.2.3 The Large Pocketed Base
2.2.4 The Bulkhead Base
2.2.5 The Split Base
2.3 Funneling for Victory
2.4 Upgrading multiple defenses at the same time
2.5 Having a glaring flaw in your base
2.6 Buildings outside walls are too spread out
2.7 Turret Range Considerations: What can your towers defend?
2.8 Spawn Forcing
2.8.1 Trick Spawns
2.8.2 Why use trick spawns?
2.9 Messing with Wall Breakers
2.9.1 Decoy Walls
2.9.2 Outer walls with Buttresses
2.9.3 Using extra walls for Buffering
2.10 Upgrading walls
2.10.1 Oh, and DO NOT upgrade your walls in a polka dot manner.
2.11 Placing Traps
2.12 Clan Castle Placement
2.13 Tips and Tricks for Base Defense


2.1 Are you a tempting target?The best way to not get attacked is to not make it worth your attacker’s time. There are several things that an attacker will likely attack to get, or not attack due to the presence of.

2.1.1 Large amounts of Loot!Loot is the #1 reason people will attack at low levels. If you don’t have much to steal, you’re safe! Spend as much as you can on walls prior to starting any upgrade. Spend on removing natural decorations when the builder is available. If you don’t have a worker available, start a research project in the Laboratory (elixir) or buy decorations (gold and elixir). Note that gold not collected (in Gold Mine or Elixir Collector) can be stolen. Other ways to spend resources - Queuing units (even when your army camps are full), building spells, starting research, buying defenses (bombs/spring traps), buying decorations (flowers and flags, they will prevent enemy spawning on top of them).

2.1.2 Having easily accessible lootAccessible loot comes in two types - accessible mines/collectors and accessible storage. Both are bad. Make sure your storage is either empty or in the middle of your base. Make sure your mines/collectors are next to your walls (and therefore next to your defenses). Uncollected resources are easier to steal then collected ones - the buildings are more spread out and the buildings have lower HP.

You should also intermix your elixir collections and mines as well as your elixir storage and gold storage. If an opponent really wants your gold, and all of your mines are together in a nice line, it is much more tempting of a target as not as much needs to be invested to steal the single resource they are seeking. Similarly, make sure your two gold storage are not next to one another. 

2.2 Having a Good BaseSee Chapter 1 for details (Common issues: not protecting your defenses, mortar and air defense placement, everything-inside-walls issue, spread out defenses). Also having defenses that are significantly below the ‘normal’ upgraded amount for your trophy count/level. Here are a few more common bases and what I think of each.

2.2.1 The Standard BaseThe standard base follows all of the rules laid out in Chapter 1 - Defenses and storage inside of the walls, army camps, barracks, mines, extractors, etc etc etc outside of the walls. There is a single wall dividing your precious base from the hordes of horrors outside. Now What? How can you improve your base? Well this standard base is weak to giants as once they breach your wall, they can attack all of your defenses without delay. It is also weak to mass goblin attacks for the same reason - Once inside they can often outrun splash damage and steal all of your goodies, possibly leaving you with a victory, but with many less resources to spend.

2.2.2 The Pocketed BaseThis base has the town hall in the center, and every defense around it is surrounded by its’ own 4x4 wall. They are good against giants as the walls slow them down, while keeping the defenses are close together. They are best attacked with giants and archer support.

2.2.3 The Large Pocketed BaseThis base is a variant on the pocketed base, where each pocket has 2-3 structures in each pocket. It is more efficient in terms of wall usage than the pocketed base, allowing for more buildings to be placed within the walls. People who love symmetry in their bases will like the 3 pocket base, as it creates a nice spiral with no wasted space or walls. The differences between this as the Pocketed base are minimal. This base type is more common than the Pocked Base at lower levels due to lack of walls.

2.2.4 The Bulkhead BaseA Bulkhead Base follows the rules laid down in chapter 1 about kicking unneeded buildings outside of the walls, then uses extra walls to segment defenses into different sections allowing for greater protection in case one section is breached (especially by giants). Bulkheads are used in large boats to prevent the entire boat from sinking in case of a leak below the waterline - The flooded sections are closed off via built in bulkheads, containing the flooding to only the affected sections. In the same way, bases use this strategy to contain (or slow) the flood of enemy troops to the breached bulkhead - Where as a single wall a breach would mean your clan is headed to destruction.

2.2.5 The Split BaseA somewhat common (but poor) base defense strategy is grouping your defenses into two groups, with critical non-defensive buildings between them (Town Hall, Resource Storage). This defensive strategy seems to not violate the rules I’ve put down in Chapter 1, but it actually violates the rule of keeping your defenses too spread out. Your defenses should be able to cover each other, ideally as much as possible - keeping them in two groups should be avoided. A split base defense is very vulnerable to giant attacks as they can clean up half of the defenses without taking fire from the other half. Split bases also mean that if either side is wiped out, your critical buildings in the center are very vulnerable to a few archers attacking from that side, effectively meaning your base is half as weak as otherwise.

2.3 Funneling for Victory
Funneling is critical to getting the best results out of your splash damage dealing turrets. It basically means using buildings (mostly walls) to make your enemy go where you want it to go, and then die as you want it to die.

This is how my current base funnels enemies.

Proper funneling turns this into this

Do I need to say more? Funneling is also critical to proper trap usage. See section 2.11 below. 

2.4 Upgrading multiple defenses at the same timeYour defenses don’t attack if they’re in the middle of being upgraded when you’re attacked! Try not to be upgrading 40% of your defenses at the same time. This is doubly true for splash damage buildings (mortar, wizard tower) and air defense.

2.5 Having a glaring flaw in your base
Such as a spawn point where you moved a turret out of but didn’t put anything back. Or not having an air defense turret. Or putting your air defense turret outside of your walls. 


2.6 Buildings outside walls are too spread out
At higher levels, more players start caring about trophies. If an attacker sees your base is easy to 1-star (kill 50% of the buildings) without having to place too many troops they will see you as a good target. Keep your buildings close to your walls (and defenses) to prevent this, if you care about maintaining your trophy count.


2.7 Turret Range Considerations: What can your towers defend?
One of the goals of placing less valuable buildings outside of your walls is to slow down your attackers once they are within range of your defenses. NOT to make them spawn farther back - This is of secondary priority. This section covers what that range actually means. Range in this game is also sorta screwed up - Sometimes a turret will decide it can attack a unit standing in a given square, but on another base (with identical unit and turret placement) it won’t attack. This ambiguity is why it has taken me about 2 weeks longer to post Chapter 2 than I was hoping. I still haven’t figured out why it does this.

What can and can’t be attacked without taking return fire is summarized in these pics. 

Cannon - Range 9Archer Tower - Range 10
Archer - Range 4 


2.8 Spawn Forcing
Spawn forcing refers to forcing your opponent to spawn further away from your important buildings, or your base in general. The objective is to attempt to persuade your opponent to attack from a different side of your base and to delay their reaction time (placing reinforcements). You can create this gap outside of your base by arranging your exterior buildings, placing extra walls, placing decorations and utilizing natural decorations. It is not recommended to use buildings to force your opponent to spawn further away, as buildings are more useful to delay your opponent once they are in range of your turrets. However, if you spread out your walls in singles (optimal distribution to create a large no-spawn-zone) wall breakers will almost never attack them. Spawn forcing allows your defenses to kill many wall breakers before they get to your walls if they are unsupported. For other wall breaker defense tips, see decoy walls below. If allowed to spawn directly next to your wall, wall breakers are able to detonate before turrets can strike, even if the wall breaker would normally be one hit by the turret. 


2.8.1 Trick Spawns
Trick spawns are ‘mistakes’ in a spawn forcing situation. Usually a single hole, they are closer to the center of your base the rest of the spawn force allows. However they are intentional and you should make sure you have turrets (especially mortars) barely within range of the spawn square in question.


2.8.2 Why use trick spawns?
Spawn tricks are fun (I’ve had an opponent put down 31 archers in a trick spawn just to have them all die to a single mortar hit - they didn’t opt to continue attacking). Normally they don’t matter but occasionally they help. If created without care, they can allow your opponent an advantage (such as if they can deploy wall breakers). It is inadvisable to rely on traps to defend a trick spawn - if you get attacked twice in a row they won’t be there the second time, plus a smart attacker will place a single unit in the square in question to test for traps.


2.9 Messing with Wall Breakers
Wall breakers are often used in conjunction with giants to get them through the outer walls faster. Here are a few tips to mess with the Wall Breaker AI.


2.9.1 Decoy Walls
Decoy walls are segments of walls of at least 8 that wall breakers will target if they are closer than your real walls. They can also be used to funnel archers and barbarians into taking lots of splash damage from mortars and wizards. Segments of 7 or less don’t seem to work most of the time (seems to be partially based on spawn proximity). If you do further testing and discover any additional details, please report back (for science).


2.9.2 Outer walls with Buttresses
When used in game they look like this. The wall breaker will attack the buttress rather than the walls. Giants will ignore them and proceed straight to the inner walls. Only once the nearby buttress is destroyed will the Wall Breaker target the main wall. This works especially well with spawn forcing, as the farther away the wall breakers spawns the more likely they will target several buttresses, rather than several targeting one buttress and then the surviving ones re-targeting onto the main wall. They can also be combined with Decoy Walls - See pictures of my base in the funneling section for how I use them in such a situation.


If you're curious about the name, buttresses are these things on churches. They support the walls from outside of the church. 


2.9.3 Using extra walls for Buffering

Visual of buffering
If you have extra walls you can also use them to protect your defenses from archers. They simple prevent archers from getting close enough to fire, however they do cut down on the number of buildings outside the wall your turret can protect so I generally only recommend this for situations where you 1) DON'T want archers attacking form 2) have walls to spare 3) don't have buildings which can defend your turret instead. This situation can be considered the advanced method of 'Defending your Defenses' (from Chapter 1) but is generally not viable to lower level players due to the number of walls necessary. 


rs attacking from that side, effectively meaning your base is half as weak as otherwise.

2.3 Funneling for Victory
Funneling is critical to getting the best results out of your splash damage dealing turrets. It basically means using buildings (mostly walls) to make your enemy go where you want it to go, and then die as you want it to die. 


This is how my current base funnels enemies.
Proper funneling turns this into this

Do I need to say more? Funneling is also critical to proper trap usage. See section 2.11 below. 

2.4 Upgrading multiple defenses at the same timeYour defenses don’t attack if they’re in the middle of being upgraded when you’re attacked! Try not to be upgrading 40% of your defenses at the same time. This is doubly true for splash damage buildings (mortar, wizard tower) and air defense.

2.5 Having a glaring flaw in your base
Such as a spawn point where you moved a turret out of but didn’t put anything back. Or not having an air defense turret. Or putting your air defense turret outside of your walls. 


2.6 Buildings outside walls are too spread out
At higher levels, more players start caring about trophies. If an attacker sees your base is easy to 1-star (kill 50% of the buildings) without having to place too many troops they will see you as a good target. Keep your buildings close to your walls (and defenses) to prevent this, if you care about maintaining your trophy count.


2.7 Turret Range Considerations: What can your towers defend?
One of the goals of placing less valuable buildings outside of your walls is to slow down your attackers once they are within range of your defenses. NOT to make them spawn farther back - This is of secondary priority. This section covers what that range actually means. Range in this game is also sorta screwed up - Sometimes a turret will decide it can attack a unit standing in a given square, but on another base (with identical unit and turret placement) it won’t attack. This ambiguity is why it has taken me about 2 weeks longer to post Chapter 2 than I was hoping. I still haven’t figured out why it does this.

What can and can’t be attacked without taking return fire is summarized in these pics. 

Cannon - Range 9Archer Tower - Range 10
Archer - Range 4 


2.8 Spawn Forcing
Spawn forcing refers to forcing your opponent to spawn further away from your important buildings, or your base in general. The objective is to attempt to persuade your opponent to attack from a different side of your base and to delay their reaction time (placing reinforcements). You can create this gap outside of your base by arranging your exterior buildings, placing extra walls, placing decorations and utilizing natural decorations. It is not recommended to use buildings to force your opponent to spawn further away, as buildings are more useful to delay your opponent once they are in range of your turrets. However, if you spread out your walls in singles (optimal distribution to create a large no-spawn-zone) wall breakers will almost never attack them. Spawn forcing allows your defenses to kill many wall breakers before they get to your walls if they are unsupported. For other wall breaker defense tips, see decoy walls below. If allowed to spawn directly next to your wall, wall breakers are able to detonate before turrets can strike, even if the wall breaker would normally be one hit by the turret. 


2.8.1 Trick Spawns
Trick spawns are ‘mistakes’ in a spawn forcing situation. Usually a single hole, they are closer to the center of your base the rest of the spawn force allows. However they are intentional and you should make sure you have turrets (especially mortars) barely within range of the spawn square in question.


2.8.2 Why use trick spawns?
Spawn tricks are fun (I’ve had an opponent put down 31 archers in a trick spawn just to have them all die to a single mortar hit - they didn’t opt to continue attacking). Normally they don’t matter but occasionally they help. If created without care, they can allow your opponent an advantage (such as if they can deploy wall breakers). It is inadvisable to rely on traps to defend a trick spawn - if you get attacked twice in a row they won’t be there the second time, plus a smart attacker will place a single unit in the square in question to test for traps.


2.9 Messing with Wall Breakers
Wall breakers are often used in conjunction with giants to get them through the outer walls faster. Here are a few tips to mess with the Wall Breaker AI.


2.9.1 Decoy Walls
Decoy walls are segments of walls of at least 8 that wall breakers will target if they are closer than your real walls. They can also be used to funnel archers and barbarians into taking lots of splash damage from mortars and wizards. Segments of 7 or less don’t seem to work most of the time (seems to be partially based on spawn proximity). If you do further testing and discover any additional details, please report back (for science).


2.9.2 Outer walls with Buttresses
When used in game they look like this. The wall breaker will attack the buttress rather than the walls. Giants will ignore them and proceed straight to the inner walls. Only once the nearby buttress is destroyed will the Wall Breaker target the main wall. This works especially well with spawn forcing, as the farther away the wall breakers spawns the more likely they will target several buttresses, rather than several targeting one buttress and then the surviving ones re-targeting onto the main wall. They can also be combined with Decoy Walls - See pictures of my base in the funneling section for how I use them in such a situation.


If you're curious about the name, buttresses are these things on churches. They support the walls from outside of the church. 


2.9.3 Using extra walls for BufferingVisual of buffering
If you have extra walls you can also use them to protect your defenses from archers. They simple prevent archers from getting close enough to fire, however they do cut down on the number of buildings outside the wall your turret can protect so I generally only recommend this for situations where you 1) DON'T want archers attacking form 2) have walls to spare 3) don't have buildings which can defend your turret instead. This situation can be considered the advanced method of 'Defending your Defenses' (from Chapter 1) but is generally not viable to lower level players due to the number of walls necessary.


Saturday, April 20, 2013

New Update - Clash of Clans Leagues 17/4/13 (3.124)


There is a new update, I haven't played this one yet (I really haven't had much time to play lately) but I have been reading through the release notes and it looks good, Im going to see what leagues is al about after this.

Introducing Leagues: compete in your own division!

✔ Joining a League is easy: just own 400 trophies or more!

✔ Get a Loot Bonus out of every victory just from being in a League!

✔ Loot Bonus increases the higher you climb in the Leagues


New unit, defenses and building upgrades

✔ Rock Hard: summon a mighty Golem with Dark Elixir. A glutton for punishment, the Golem won't stop even if you ♥♥♥♥ it in half!

✔ Upgrade the Dark Barracks to level 4 to unlock the Golem

✔ Bolster your defenses with an additional Wizard Tower and a Seeking Air Mine at Town Hall level 9

✔ Level 5 Clan Castle and level 7 Hidden Tesla upgrade now available, also at Town Hall level 9!


Clan improvements

✔ Clan Leader is now able to send messages directly to Clan Members' inboxes

✔ Chat message formatting overhauled

✔ Clan tournament length increased to two weeks, reward doubled

✔ Troop donation statistics now reset every other week

✔ Clan troop donation information is now visible to all players, not just Clan members


Usability improvements

✔ If Clan Castle has space for more troops, "Request" message displayed on top of it

✔ Added option for rotating a Wall section

✔ Added confirmation dialog when speeding up unit and spell upgrades

✔ Attack notification improved for players playing with multiple devices


Balance tweaks

✔ The percentage of loot that can be stolen from Gold Storage and Elixir Storage was decreased to make it easier for newer players to save up resources. The maximum possible amount of loot remains the same.

✔ Upgrade times for Hog Rider, Minion, and Valkyrie decreased

✔ Air Bomb explosion radius decreased

✔ Level 5 Minion hitpoints decreased

✔ Hidden Tesla trigger radius increased

✔ Gold Mine, Elixir Pump and Dark Barracks upgrade times reduced

✔ Spells are now much faster to create

✔ Balloons explode and deal additional damage when destroyed

✔ Wall Breaker behavior improved

✔ Mortar and Wizard Tower don't restart their attack cycle if their would-be target is destroyed, instead they switch targets

✔ Clan Castle troops deploy faster to the battlefield

✔ When your village is under attack from flying units only, your melee troops will stay inside the Clan Castle

---------------------------

Im going to play through the update this weekend and get back up to date with the game as I had time off, also I noticed people selling hero's and accounts on ebay!? more on that soon.

Tuesday, December 9, 2014

Archer Tower shoots x2 faster Christmas 2014 Update


Next Sneak Peak released by SuperCell after the two previous one Christmas Update 2014 Sneak Peak 1 and Sneak Peak 2 Gold Mine and Elixir Collectors level 12 is really exciting, they made Archer Tower shoot twice faster as the regular speed but half a damage per shoot, so if the Damage per Second is 52 then in one second it will shoot two arrows but with damage 26 for one. 


Archer Tower shooting 2 arrow in 1 second

Will this affect the game ?

After this news release a lot of people started to wonder if this will make Archer Towers like X-bows or will make them more powerful. The answer is no in Archer Towers from level 1 to at least 9 and yes in Archer Towers from level 10 to 13. Easiest way to explain this is to use Archers as example.

Will not affect the game in Town Hall from level 8 and below because :
In low-mid level Archer Towers like 1 to 9 this makes no difference because if a level 5 Archer has 40 hit points than it will take two "one second" shoots to take her down.

Will affect the game in Town Hall from level 9 and above because :
But in higher level Archer Tower like 10 to 13 when a level 5 Archer has 40 hit points and a level 12 Archer Tower has 86 damage per second then two "one second" shoots will take down 2 Archers level 5 .

Below you have video from Clash of Clans Attack who explains Archer Tower improvements in a more detailed guides with some footage and examples. Visit us again for more news about Christmas 2014 Update. Enjoy


Friday, August 15, 2014

Hog rider attack strategy after update - Clash of clans

Maybe all of us knew about Hog Rider. Hog rider is a very powerful troop, can destroy almost of bases easily, right? But with the new update (unlurable heroes), someone said that no chances for using Hog Rider. But no, we still have chances for them. Some bases still put heroes outside or nearby outside, and we can kill them first, after that is the job for Hog rider . Here is some nice Hog rider battles at almost max town hall 10, watch it now

Hog riders + GoWiWiPe combo:
- Your troops: 2 golem, 3 witches, 12 wizards, 17 hogs, 3 wall breakers, 5 goblins,
- Spell: 1 freeze, 1 rage, 1 lightning, 2 heal
- CC troops: 1 pekka, 1 valkyrie, 2 barbarian

Normal combo:
 - Combo 1: 38 hogs,3 witchs, 4 wall breakers, 6 barbs, 3 healings, 1 rage, 1 freeze
 - Combo 1: 36 hogs, 2 giants, 2 witchs, 8 wall breakers, 10 barbs, 4 healings, 1 rage
 - CC troops: 2 witchs, 2 wizs, 3 barbs

Sample clips: